Maximize Your Viewing Experience with a Ceiling Mount Projector: The Ultimate Guide for Home Theater Enthusiasts
04 Sep 2024
Discover the comprehensive guide to projector screens, unraveling tips, types, and installation methods for an immersive visual experience in your presentations or entertainment setups.
Projector screens serve as essential components in delivering impactful visual presentations, whether for educational, business, or entertainment purposes. They act as the canvas on which projectors display images, videos, and presentations, offering a medium to enhance visual experiences.
Understanding Projector Screens
Projector screens are specialized surfaces designed to optimize image quality and display clarity from projectors. They come in various sizes, materials, and types to suit diverse needs. The primary goal of a projector screen is to reflect and diffuse projected light uniformly, ensuring clear and vivid visuals for the audience.
Types of Projector Screens
Projector screens encompass different types, including fixed-frame screens, motorized screens, portable screens, and more. Fixed-frame screens are permanently mounted, providing a flat and taut surface. Motorized screens offer convenience with retractable mechanisms. Portable screens, on the other hand, prioritize mobility and flexibility, often used for outdoor or temporary setups.
Benefits of Using Projector Screens
Using dedicated projector screens enhances the quality of projected images. These screens offer improved brightness, color accuracy, and contrast compared to projecting onto alternative surfaces such as walls. They optimize the viewing experience, ensuring that audiences receive the intended visual content without distortion or loss of clarity.
Choosing the Right Projector Screen
Selecting the right projector screen involves considering factors like screen size, aspect ratio, gain, material, and intended use. Understanding these aspects helps in picking the most suitable screen for specific projection requirements, ensuring optimal performance and visual appeal.
Conclusion
Projector screens play a pivotal role in delivering impactful visual presentations by optimizing image quality, ensuring uniform light reflection, and enhancing audience viewing experiences. In the subsequent sections, we'll delve deeper into different types of projector screens, their features, benefits, and how to choose the ideal screen for varying presentation needs.
Projector screens come in diverse types, each designed to suit different environments, projection needs, and usage scenarios. Understanding these variations assists in selecting the most appropriate screen for specific visual presentation requirements.
1. Fixed Frame Projection Screens
Fixed frame screens are among the most common types, featuring a permanently tensioned fabric surface stretched over a sturdy frame. These screens provide a flat and wrinkle-free display area, ensuring excellent picture quality. They're ideal for dedicated home theaters, conference rooms, and environments with controlled lighting.
2. Motorized Projection Screens
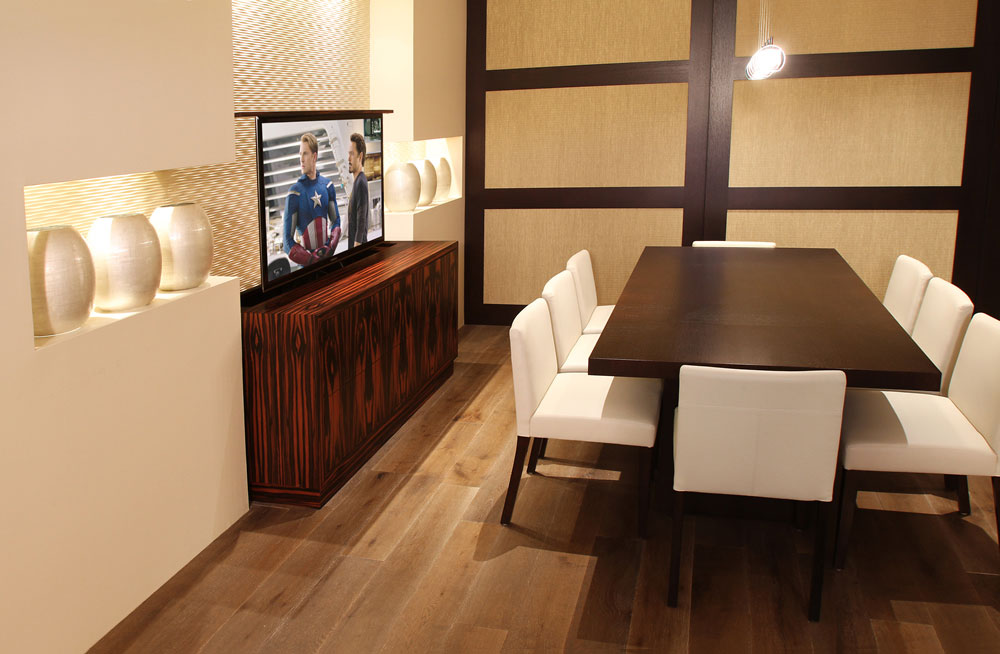
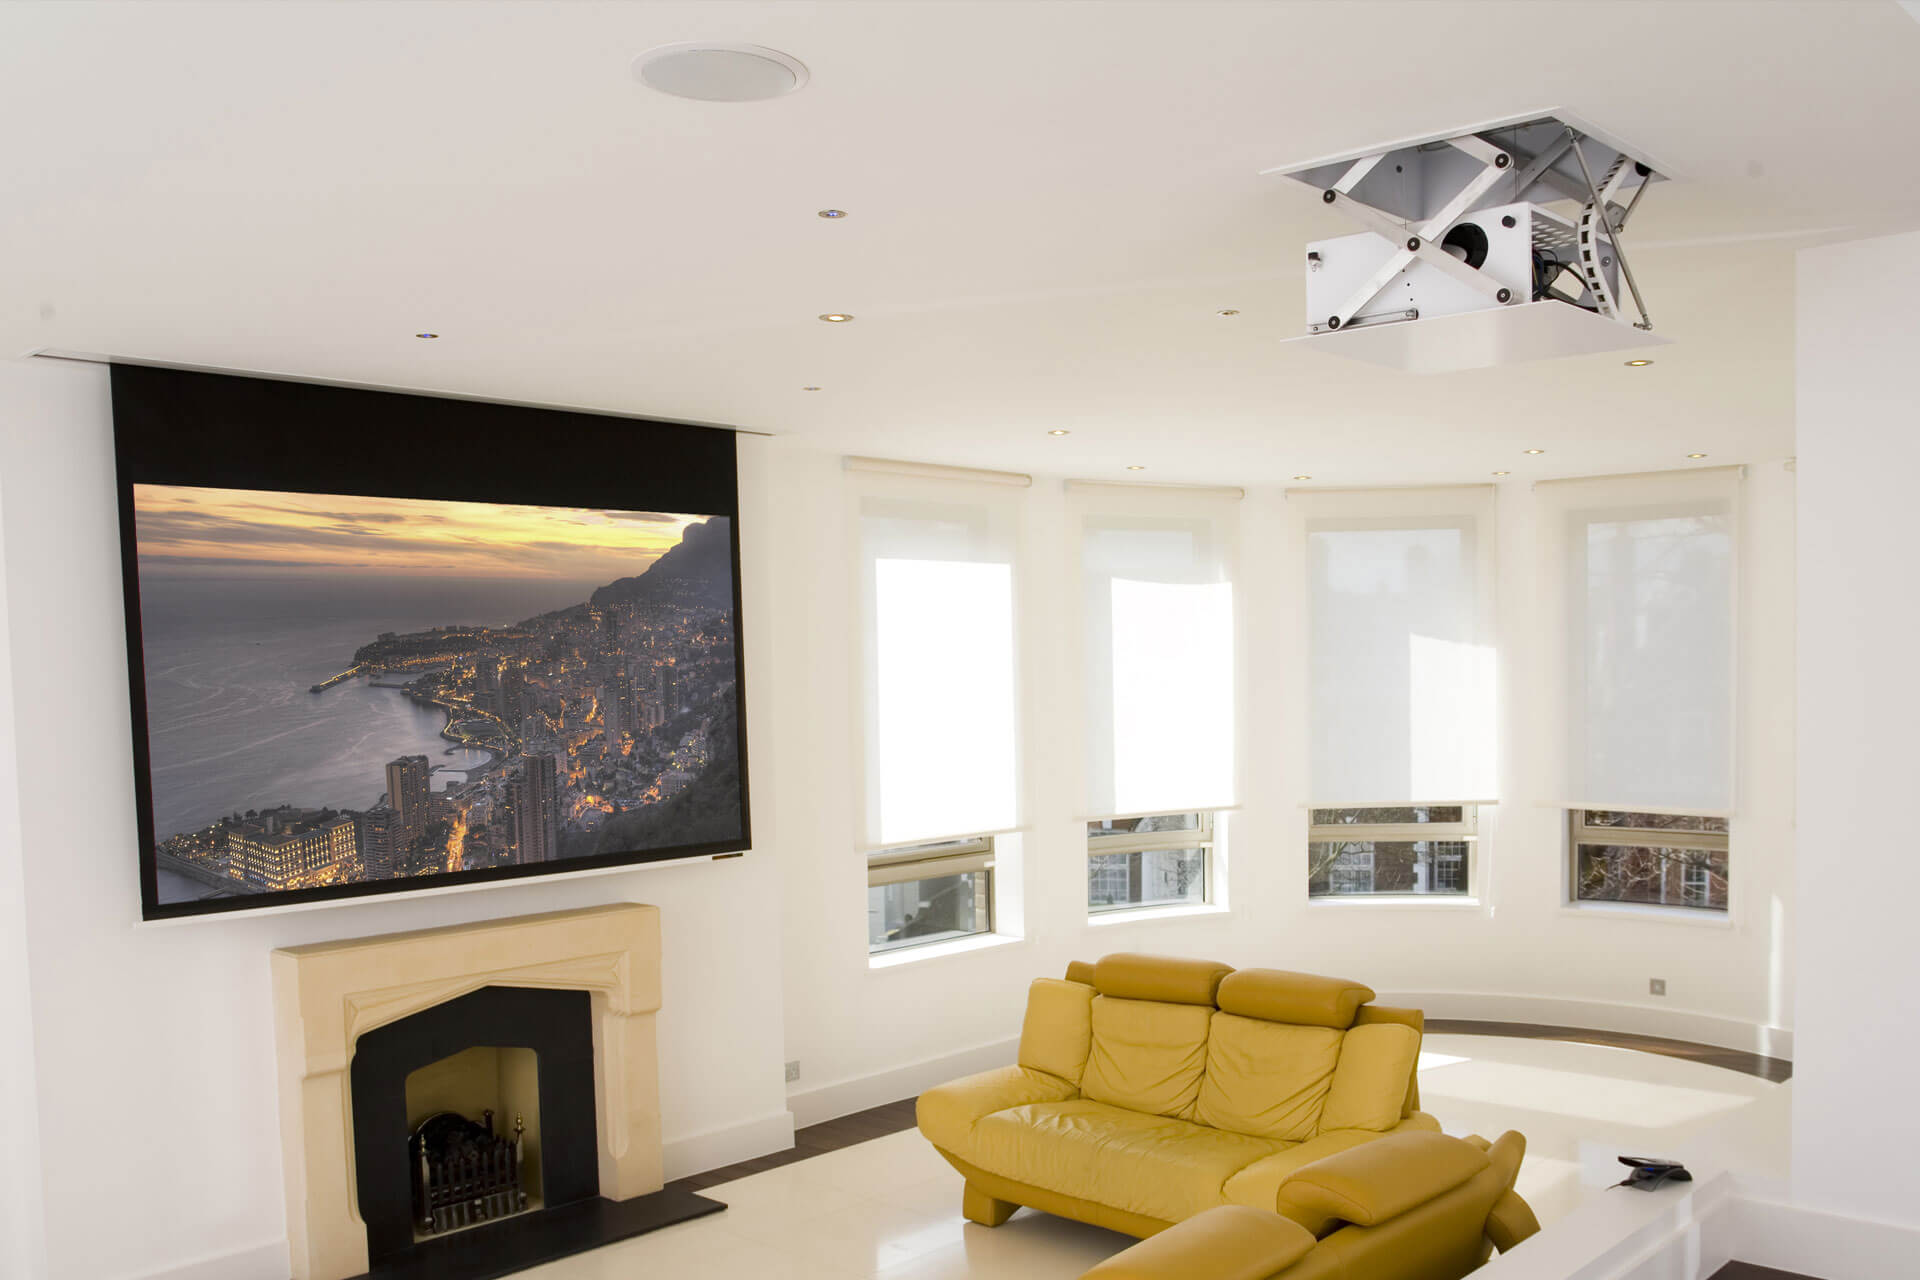
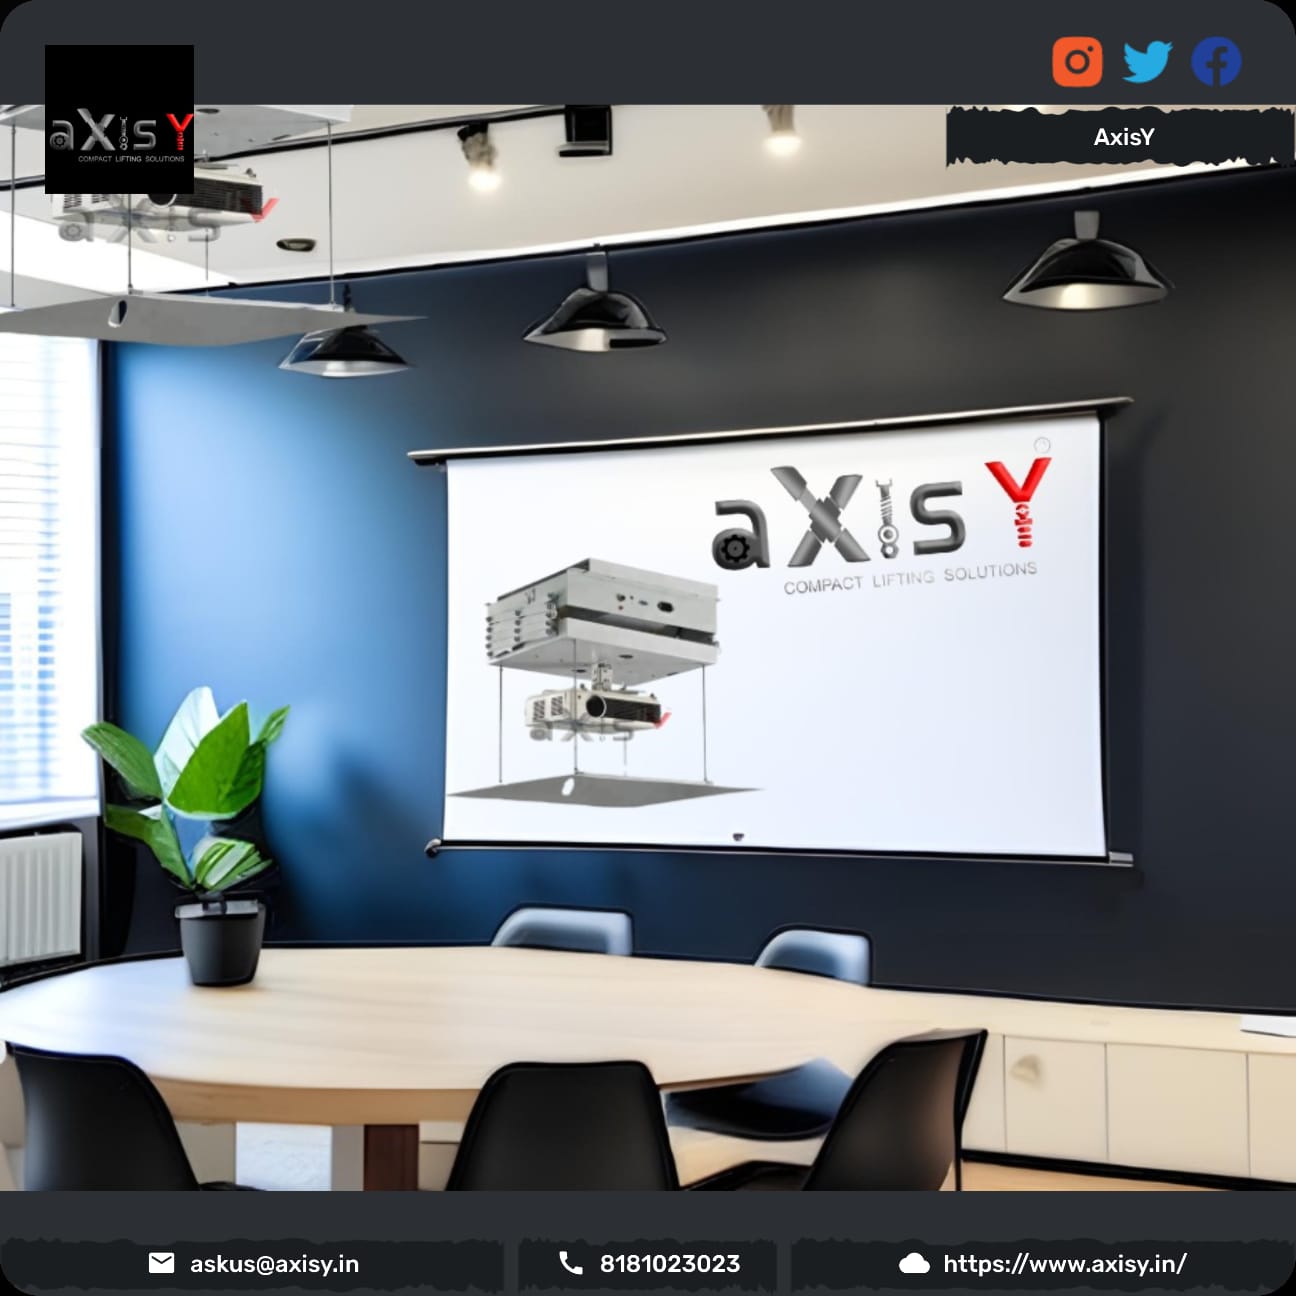
Motorized screens offer convenience through automated operation. With the touch of a button or remote control, these screens descend or retract into a housing unit. They're popular in home theaters and conference spaces where a hidden screen is desired, maintaining a sleek appearance when not in use.
3. Portable Projection Screens
Portable screens prioritize mobility and flexibility. These screens are lightweight, easy to set up, and suitable for outdoor events, temporary presentations, or locations where permanent installation isn’t feasible. They come in various forms like pull-up screens, tripod screens, or inflatable screens, catering to different needs.
4. Manual Pull-Down Projection Screens
Manual pull-down screens feature a retractable design where the screen material rolls up into a casing when not in use. They're cost-effective and straightforward, commonly used in classrooms, small meeting rooms, or homes where occasional projection is required.
5. Tab-Tensioned Projection Screens
Tab-tensioned screens utilize tensioning systems to keep the screen surface taut and flat. This design minimizes surface wrinkling and ensures a smooth, distortion-free image. They're suitable for high-definition projection in professional settings where image quality is paramount.
6. Ambient Light Rejecting (ALR) Screens
ALR screens are engineered to mitigate ambient light interference, enhancing contrast and image clarity even in well-lit environments. These screens are ideal for spaces with high ambient light, making them suitable for living rooms, boardrooms, or venues with challenging lighting conditions.
7. Perforated Projection Screens
Perforated screens have micro-perforations in the screen material, enabling sound to pass through. They're commonly used in setups where audio systems are placed behind the screen, making them popular in cinemas and large venues.
Conclusion
The array of projector screens available caters to diverse needs, environments, and preferences. The choice of screen type significantly impacts the visual quality and overall presentation experience. Understanding the characteristics and purposes of each type assists in selecting the ideal screen that aligns with specific projection requirements.
In the subsequent sections, we'll explore in-depth details about screen materials, aspect ratios, and factors influencing the selection of the perfect projector screen.
Selecting the appropriate screen size is crucial for an optimal viewing experience during presentations, movies, or any visual content. The ideal screen size is determined by various factors, including room dimensions, audience size, projector specifications, and intended use.
Consideration of Room Dimensions
The first step in determining the right screen size is evaluating the available space. Measure the distance from the projector's placement to the screen and the distance from the screen to the audience seating area. Consider the ceiling height and any obstructions that might affect the screen's placement or size.
Aspect Ratio and Screen Dimensions
The aspect ratio refers to the width-to-height proportion of the screen. Common aspect ratios include 4:3 (standard), 16:9 (widescreen), and 16:10. Selecting a screen with the same aspect ratio as the projector's native resolution prevents image distortion and maximizes image quality.
Optimal Viewing Angle and Distance
Determining the optimal viewing angle and distance is crucial. The Society of Motion Picture and Television Engineers (SMPTE) recommends a viewing angle of 30 degrees for an immersive experience. Calculate the distance based on the screen's diagonal size, ensuring comfortable viewing without strain.
Audience Seating Arrangement
Consider the audience seating arrangement concerning the screen size. Ensure everyone has an unobstructed view without having to strain or reposition themselves. For larger audiences or venues with tiered seating, a larger screen might be necessary.
Projection Technology and Lumens Output
The projector's capabilities influence the ideal screen size. Higher lumens projectors provide brighter images suitable for larger screens or environments with ambient light. Projectors with lower lumens output may require smaller screen sizes for optimal visibility.
Practical Testing and Adjustments
Before finalizing the screen size, conduct practical tests by projecting images or content onto a temporary screen or wall of the desired size. Make necessary adjustments in screen placement or size to achieve the best visual impact and audience experience.
Conclusion
Choosing the right projector screen size involves a balance between room dimensions, aspect ratio, viewing angles, audience seating, projector specifications, and practical testing. A well-suited screen size ensures an immersive, clear, and enjoyable visual experience for audiences.
In the subsequent sections, we'll delve deeper into factors influencing screen size selection and practical tips for optimizing the projection setup.
Investing in a projector screen necessitates a thorough evaluation of various factors to ensure that it aligns with your specific requirements and provides an optimal viewing experience. Consider the following elements before making a purchase decision:
1. Screen Material and Gain
The screen material significantly impacts the projection's visual quality. Some common materials include matte white, glass-beaded, or grey screens. Each material has different properties affecting brightness, color accuracy, and viewing angles. The gain, indicating the screen's reflectivity, influences brightness; a higher gain offers increased brightness but might narrow the viewing angle.
2. Screen Size and Aspect Ratio
Determine the ideal screen size based on the available space, audience size, and viewing distance. The aspect ratio, matching the projector's native resolution, ensures proper image display without distortion. Common aspect ratios include 4:3, 16:9, and 16:10, catering to different content and display formats.
3. Fixed vs. Motorized vs. Portable Screens
Decide between fixed-frame, motorized, or portable screens based on your preferences and intended usage. Fixed-frame screens offer stability and a permanent installation option, while motorized screens provide convenience with retractable mechanisms. Portable screens prioritize mobility and flexibility, suitable for temporary setups or outdoor use.
4. Screen Gain and Viewing Angle
Consider the screen gain and its impact on brightness and viewing angles. Higher gain screens offer increased brightness but might restrict the viewing angle, whereas lower gain screens provide wider viewing angles but with reduced brightness. Select based on the room's lighting conditions and seating arrangements.
5. Ambient Light Conditions
Evaluate the ambient light conditions in the room where the projector will be used. Rooms with high ambient light might require screens with ambient light rejection properties to maintain image clarity and contrast, especially for home theaters or spaces with natural light exposure.
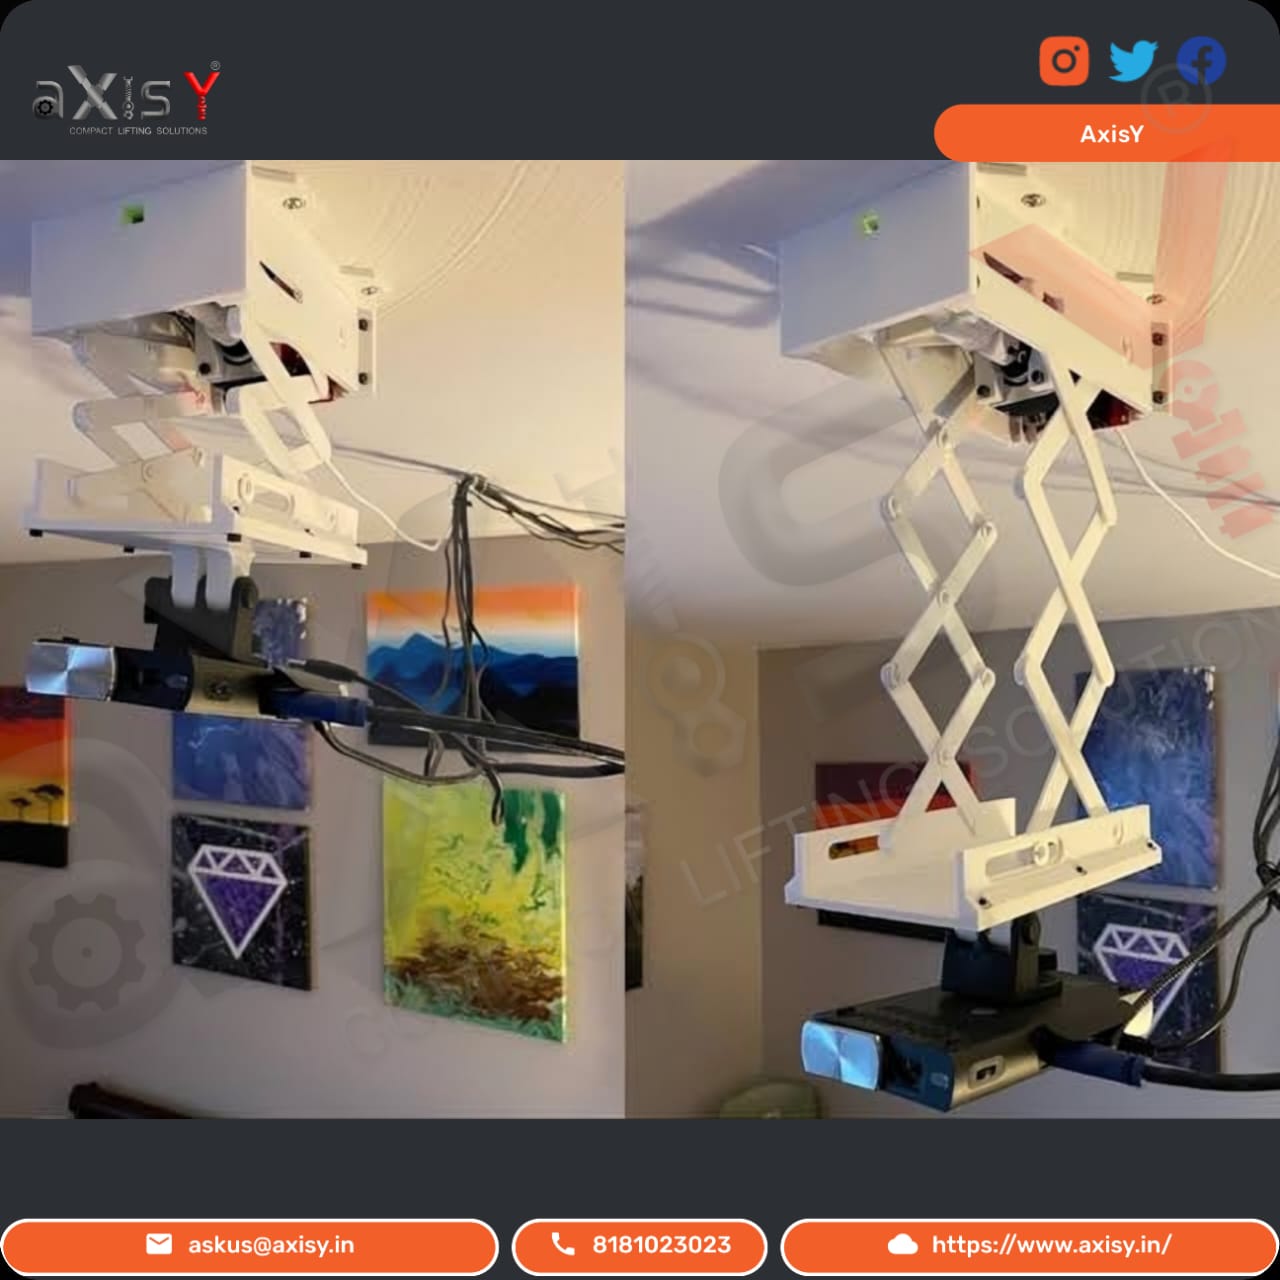
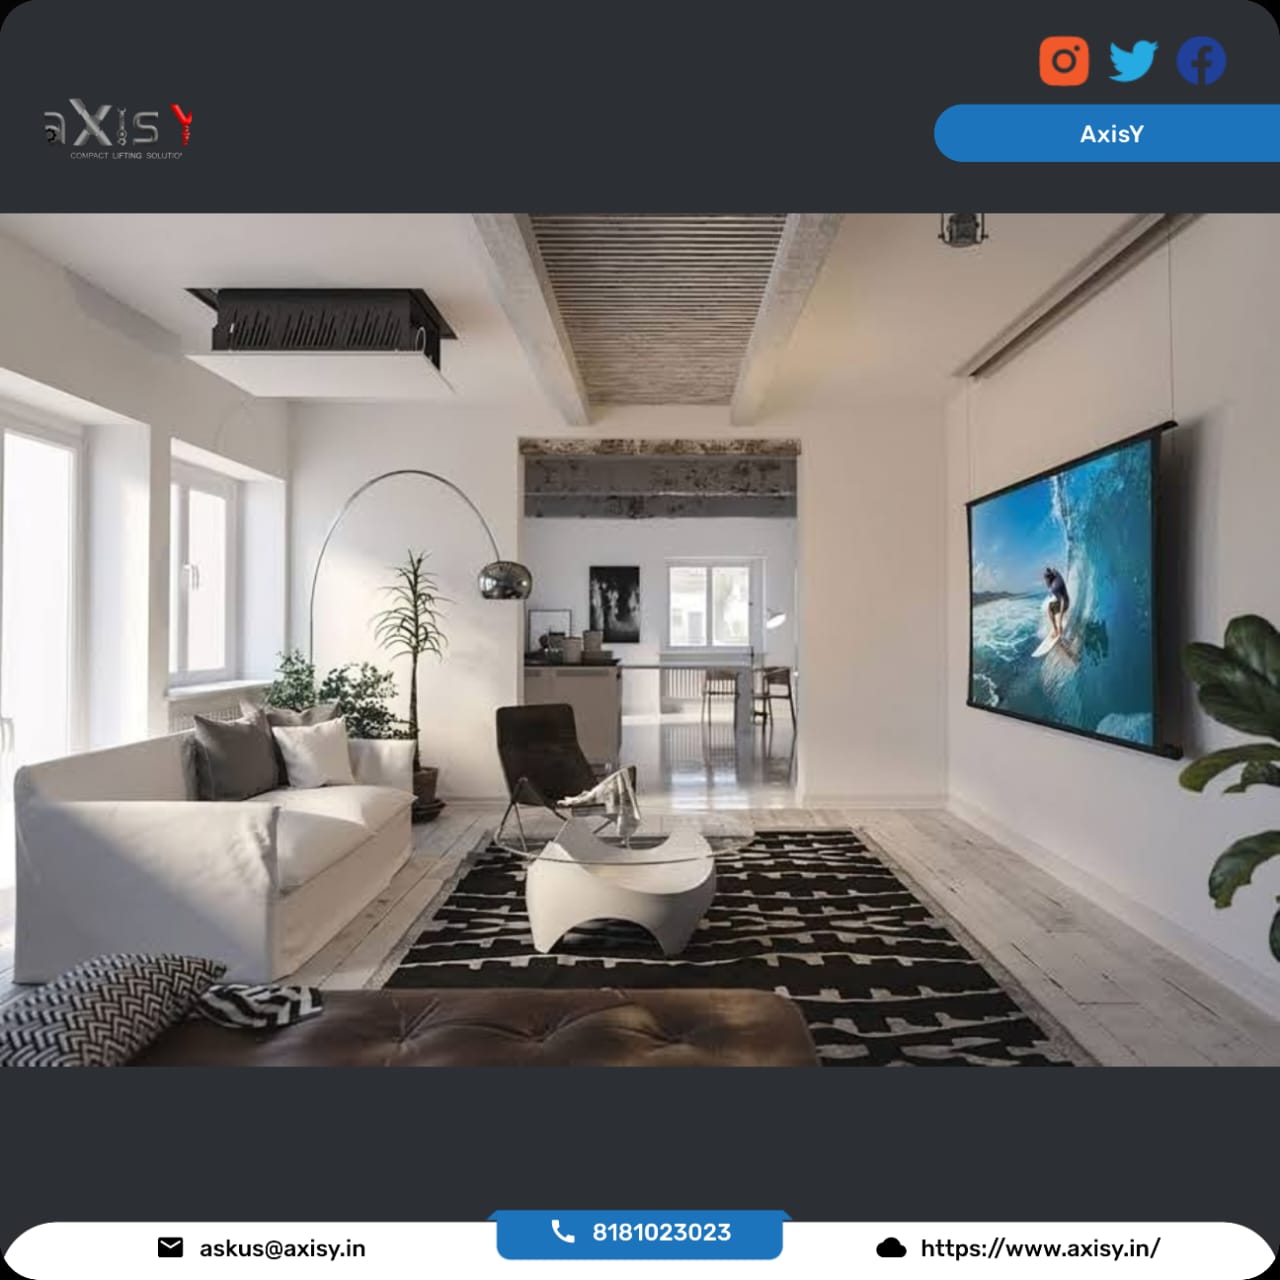
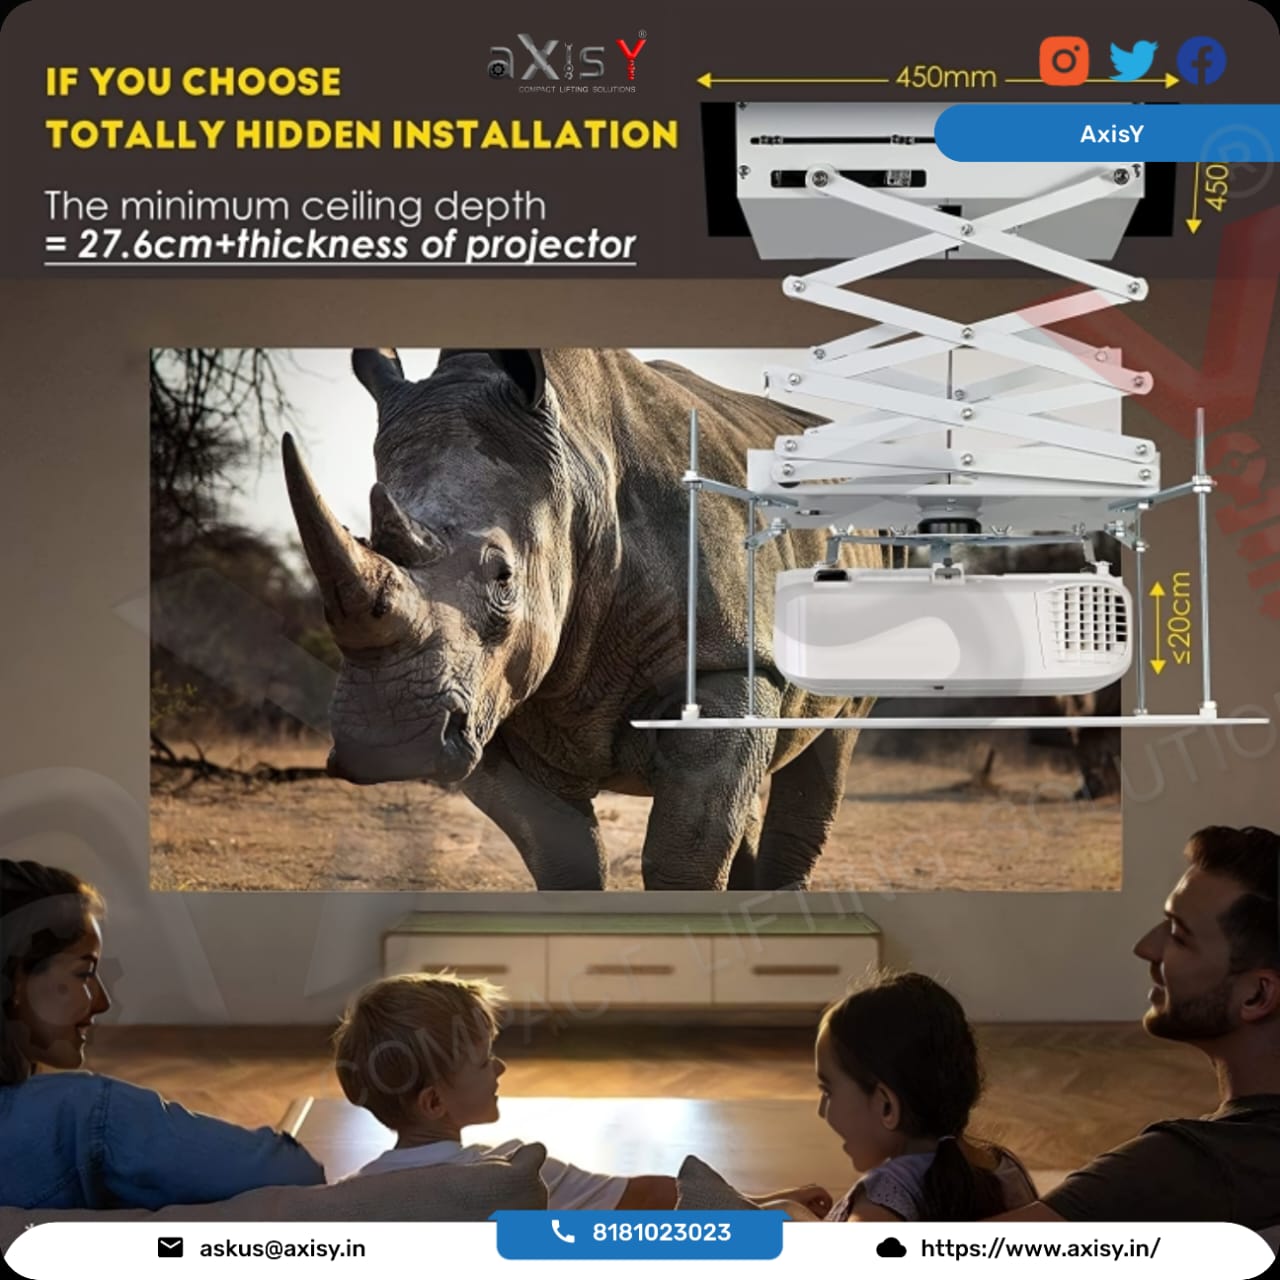
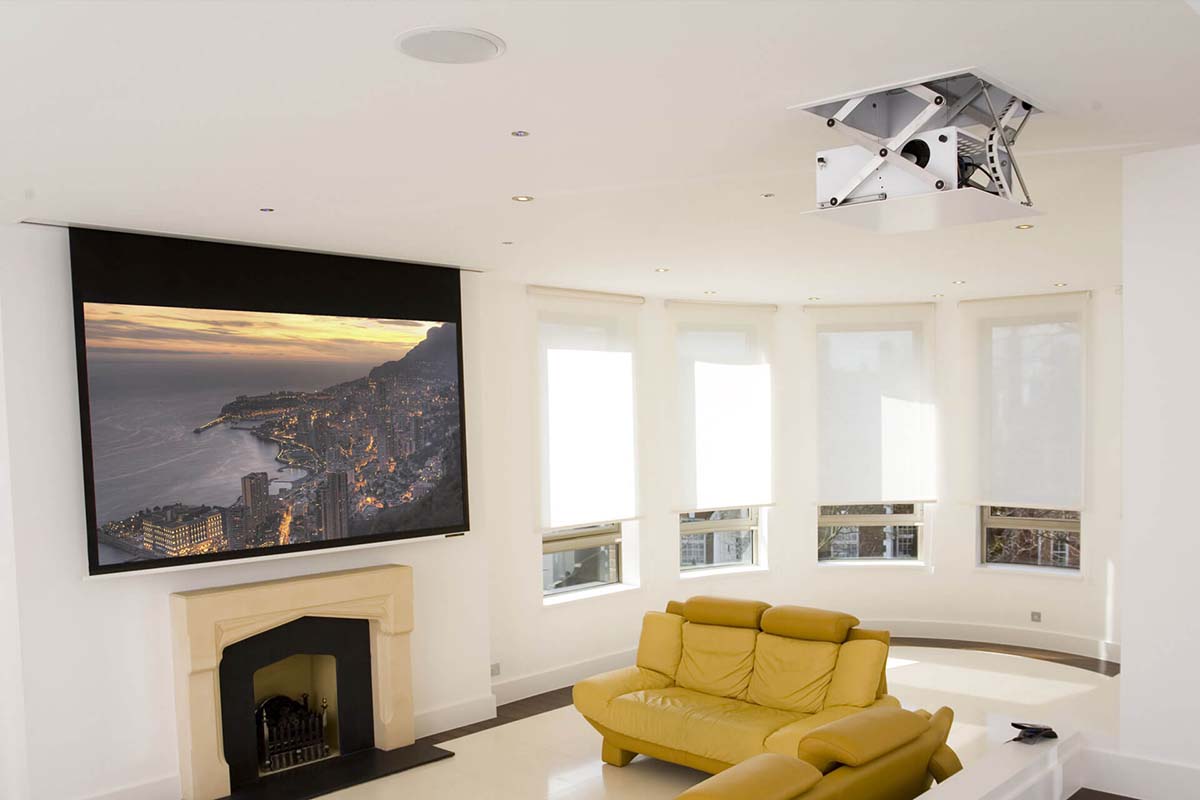
6. Installation and Mounting
Consider the ease of installation and mounting options. Some screens require professional installation due to their fixed nature, while others offer DIY setups. Ensure compatibility with your mounting preferences, whether wall-mounted, ceiling-mounted, or freestanding.
Conclusion
Before purchasing a projector screen, carefully evaluate factors such as screen material, size, aspect ratio, screen type, gain, ambient light conditions, installation requirements, and mounting options. This comprehensive assessment ensures that the chosen screen aligns with your specific needs, delivering an enhanced visual experience.
In subsequent sections, we'll delve deeper into individual factors and their impact on selecting the ideal projector screen for various settings and preferences.
Setting up a projector screen involves precise steps to ensure proper installation and optimal viewing experience. Follow these guidelines for a seamless installation process:
1. Gather the Necessary Tools and Equipment
Before starting the installation, gather the required tools and equipment, including a stud finder, measuring tape, level, power drill, screws, screwdriver, and a pencil for marking.
2. Choose the Ideal Location
Select an optimal location for mounting the projector screen. Consider the room's layout, seating arrangement, and projector placement for an unobstructed view and comfortable viewing angles.
3. Mark the Mounting Position
Using a stud finder, locate the wall studs or ceiling joists where the screen will be mounted. Mark these positions using a pencil, ensuring accuracy and alignment.
4. Mounting the Brackets or Mounting Hardware
Install the mounting brackets or hardware securely onto the wall or ceiling, aligning them with the marked positions. Use the appropriate screws and ensure they are firmly attached to the studs or joists for stability.
5. Unpack and Assemble the Screen
Carefully unpack the projector screen and assemble it according to the manufacturer's instructions. Ensure all components are securely attached and assembled correctly.
6. Attach the Screen to the Mounting Hardware
With the help of an assistant, lift the screen and hang it onto the mounting brackets or hardware. Ensure it is leveled and aligned correctly, using a level to confirm its horizontal and vertical positioning.
7. Secure the Screen in Place
Once the screen is in position, securely fasten it to the mounting hardware using the provided screws or locking mechanisms. Verify that the screen is stable and does not wobble.
8. Test the Projection
Connect the projector to your media source and project an image onto the screen. Ensure that the projected image is centered, clear, and fits within the screen boundaries.
9. Make Necessary Adjustments
Fine-tune the screen's position, angle, and tension if required. Use the adjustments provided by the screen manufacturer to optimize the image alignment and tension.
10. Conceal Wiring (If Necessary)
If there are visible wires or cables, consider concealing them using cable management solutions or by routing them through walls or ceilings for a cleaner look.
11. Final Checks
Perform a final check to ensure the screen is securely mounted, leveled, and the projected image is of high quality and properly aligned.
Conclusion
Following this step-by-step guide ensures a successful installation of your projector screen, providing a conducive environment for an immersive and enjoyable viewing experience. Carefully adhere to manufacturer guidelines and safety precautions throughout the installation process.
In subsequent sections, we'll explore maintenance tips and troubleshooting techniques to ensure your projector screen maintains optimal performance over time.
Regular maintenance plays a crucial role in extending the lifespan and preserving the quality of your projector screen. Implement these maintenance tips to ensure optimal performance and longevity:
1. Regular Cleaning Routine
Dust, dirt, and fingerprints can accumulate on the screen's surface, affecting image clarity. Use a soft microfiber cloth or a screen-specific cleaning solution to gently wipe the surface in a horizontal motion. Avoid using abrasive materials or harsh chemicals that could damage the screen's material.
2. Avoid Physical Damage
Prevent accidental damage by keeping sharp objects away from the screen and handling it with care during installation, adjustment, or any handling processes. This helps maintain the screen's integrity and prevents tears or punctures.
3. Inspect for Damages and Stains
Periodically inspect the screen for any damages, stains, or signs of wear and tear. Address minor issues promptly to prevent them from escalating. Treat stains with mild detergent solutions or specialized cleaners recommended by the manufacturer.
4. Proper Storage (For Portable Screens)
If you have a portable projector screen, store it in a dry and clean environment when not in use. Follow the manufacturer's instructions for folding or rolling the screen to avoid creases or damage to the fabric.
5. Adjust and Tension the Screen
Regularly check and adjust the tension of the screen material if it's a retractable or tensioned screen. Proper tensioning prevents wrinkles or sagging, ensuring a smooth and flat surface for optimal projection.
6. Check Mounting and Hardware
Periodically inspect the mounting brackets, screws, or any hardware used to secure the screen. Ensure they are tightened properly and haven't loosened over time, which could compromise the stability of the installation.
7. Climate Considerations
Extreme temperatures or humidity can impact the screen's material. Avoid exposing the screen to direct sunlight or storing it in areas prone to moisture or humidity, as these conditions can degrade the screen material.
8. Follow Manufacturer Guidelines
Adhere to the manufacturer's guidelines and recommendations for maintenance, cleaning procedures, and any specific care instructions provided for your projector screen model.
Conclusion
Regular maintenance and proper care significantly contribute to the longevity and performance of your projector screen. By implementing these maintenance tips, you can ensure that your screen continues to deliver high-quality visual experiences for an extended period.
In the following sections, we'll delve into troubleshooting techniques and expert advice for resolving common projector screen issues and ensuring its optimal functionality.
The projection surface plays a pivotal role in delivering optimal image quality, clarity, and overall visual experience. Several surfaces are available, each with distinct properties and suitability for various environments. Let's explore different projection surfaces to help determine the ideal choice:
1. Matte White Surfaces
Matte white surfaces are the most common and versatile projection screens. They provide uniform light diffusion, ensuring wide viewing angles and accurate color reproduction. These screens work well in controlled lighting environments, such as dedicated home theaters or conference rooms.
2. Glass Beaded Surfaces
Glass beaded surfaces feature tiny glass beads embedded in the screen material, enhancing brightness and image reflectivity. They're suitable for environments with low ambient light, offering increased brightness and better visibility even in darker settings.
3. Grey Surfaces
Grey screens are designed to improve contrast and black levels by absorbing ambient light. They're beneficial in rooms with moderate to high ambient light, helping enhance image contrast and minimizing washout in well-lit spaces.
4. High-Contrast Surfaces
High-contrast screens emphasize image sharpness and color accuracy by enhancing contrast ratios. These screens are ideal for environments where precise color reproduction and sharpness are critical, such as in professional photography or graphic design applications.
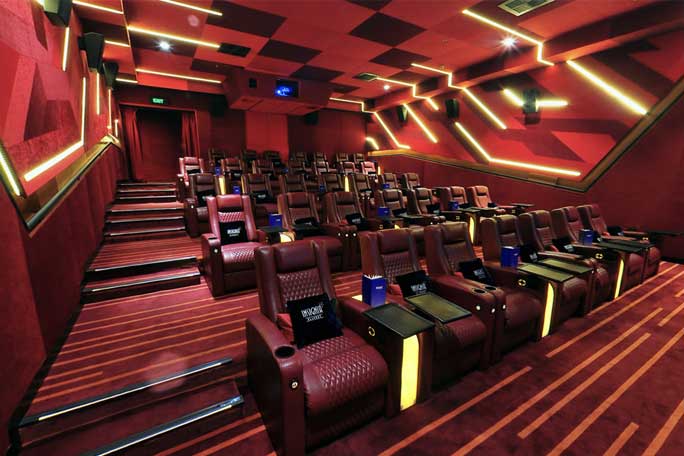
5. Acoustically Transparent Surfaces
Acoustically transparent screens feature materials that allow sound to pass through while maintaining excellent image quality. These screens are ideal for setups where speakers are placed behind the screen, commonly seen in professional theaters or high-end home theaters.
6. Ambient Light Rejecting (ALR) Surfaces
ALR surfaces are engineered to combat ambient light interference, preserving image clarity and contrast in rooms with high ambient light. They're suitable for spaces like living rooms or conference rooms with challenging lighting conditions.
7. Perforated Surfaces
Perforated screens have micro-perforations that allow sound to pass through, making them suitable for setups where audio systems are located behind the screen. These screens are commonly used in cinemas and large venues.
Choosing the Ideal Surface
Selecting the ideal projection surface depends on various factors like room lighting, desired image quality, viewing environment, and the type of content being displayed. Consider the room's lighting conditions, seating arrangements, and specific requirements before deciding on the most suitable projection surface.
Conclusion
Understanding the characteristics and suitability of different projection surfaces enables informed decisions when selecting the ideal surface for your specific projection needs. Each surface offers unique advantages, catering to various environments and preferences.
In subsequent sections, we'll delve deeper into specific use cases, advantages, and considerations for each projection surface type.
Calibrating your projector settings is essential for achieving optimal visual quality, ensuring accurate colors, brightness, and overall image performance. Follow these steps to enhance your visual experience:
1. Color Calibration
Begin with color calibration to achieve accurate color reproduction. Use calibration tools or adjust color temperature, tint, saturation, and hue settings on your projector. Ensure that colors appear natural and vibrant without being oversaturated or washed out.
2. Contrast and Brightness Adjustment
Properly adjust contrast and brightness settings to achieve the desired balance between light and dark areas in the projected image. Avoid excessively high contrast levels that may result in loss of detail or overly dark shadows.
3. Sharpness and Clarity
Fine-tune sharpness settings to enhance image clarity without introducing artifacts or excessive image enhancements. Adjust this setting cautiously to maintain a natural and smooth appearance without unnecessary enhancements.
4. Aspect Ratio and Resolution
Set the correct aspect ratio and native resolution that matches the source material. This ensures that the image is displayed correctly without distortion or cropping, providing an accurate representation of the content.
5. Keystone Correction
Utilize keystone correction to rectify distorted images caused by the projector's angle. However, excessive use of keystone correction can affect image quality, so it's preferable to position the projector correctly to avoid relying heavily on this feature.
6. Noise Reduction
Activate noise reduction settings if your projector has this feature to reduce visual noise or artifacts in the image, especially in low-light scenes or lower-quality content.
7. Gamma and Black Levels
Adjust gamma settings to fine-tune brightness levels in different parts of the image. Correct black levels to ensure deep, rich blacks without losing detail in darker areas.
8. Calibration Tools and Professionals
Consider using calibration tools or seeking professional calibration services for precise adjustments, especially in critical applications like home theaters or professional presentations.
Conclusion
Calibrating your projector's settings is crucial for optimizing visual quality and ensuring an accurate representation of the content being projected. By fine-tuning color accuracy, contrast, brightness, sharpness, aspect ratio, and utilizing correction features, you can significantly enhance your viewing experience.
In the subsequent sections, we'll explore advanced calibration techniques and expert recommendations for achieving superior visual quality in different projection environments.
As technology continues to evolve, projector screens have seen innovative advancements, catering to diverse user needs and delivering enhanced visual experiences. Let's explore the latest trends shaping projector screens:
1. Ultra-High Definition (UHD) and 4K Screens
The demand for higher resolution screens has led to the emergence of Ultra-High Definition (UHD) and 4K projector screens. These screens offer incredibly detailed and sharp images, ideal for immersive viewing experiences, especially in home theaters and professional settings.
2. Ambient Light Rejecting (ALR) Screens
ALR screens have gained popularity, especially in environments with challenging lighting conditions. These screens feature specialized materials that combat ambient light interference, preserving image clarity and contrast even in brightly lit rooms.
3. Motorized and Automated Screens
Motorized and automated screens offer convenience and elegance, allowing users to retract or deploy the screen with ease using remote controls or smart home integration. These screens are ideal for modern homes, conference rooms, and commercial spaces.
4. Acoustically Transparent Screens
Acoustically transparent screens have gained traction, allowing sound to pass through the screen material. These screens enable placement of speakers behind the screen, providing a seamless audio-visual experience without compromising sound quality.
5. Borderless and Zero-Edge Screens
Borderless or zero-edge screens provide a sleek and modern appearance, eliminating visible borders or frames around the screen. They offer a more immersive viewing experience, particularly for home theaters and high-end installations.
6. Smart and Interactive Screens
The integration of smart features and interactivity in projector screens is a rising trend. Some screens come equipped with interactive capabilities, enabling touch functionality or collaboration in educational or corporate settings.
7. Hybrid Screens
Hybrid screens combine various features, such as ALR properties with motorized functionalities or UHD resolutions with acoustically transparent materials. These hybrid solutions offer versatility, catering to multiple needs in a single screen.
8. Portable and Outdoor Screens
Portable and outdoor projector screens have seen improvements in durability, portability, and weather resistance. These screens cater to outdoor entertainment needs, from backyard movie nights to large-scale outdoor events.
Conclusion
The projector screen industry continues to evolve, offering innovative solutions that enhance visual experiences across various settings. From higher resolutions and advanced materials to smart functionalities and portability, these trends reflect a growing demand for immersive and versatile projection solutions.
In subsequent sections, we'll delve deeper into each trend, exploring its benefits, applications, and considerations for users seeking cutting-edge projector screen solutions.
Creating a projector screen through DIY methods offers a budget-friendly and personalized approach to enhancing your viewing experience. Let's explore some innovative and creative ideas to craft your own projector screen:
1. DIY Portable Projection Surfaces
a. Fabric Screens: Use a clean, white fabric or blackout cloth as a makeshift screen. Stretch the fabric tightly over a wooden frame or wall mount to ensure a smooth surface for projection.
b. Painted Surfaces: Opt for specialized projector screen paint available in various shades to transform a wall into a projection surface. Apply multiple coats evenly for better light reflection.
2. Repurposed Materials
a. Sheet or Shower Curtain: Hang a plain white sheet or a shower curtain as a temporary projection surface. Ensure it's pulled taut and securely fastened to prevent wrinkles.
b. Roller Blinds or Paper Screens: Cut a roller blind or large paper roll to desired dimensions and attach it to a frame or mount it on a wall for a quick and easily storable projection surface.
3. Outdoor Projection Surfaces
a. DIY Inflatable Screen: Create an inflatable screen by sewing together two sheets of white fabric and leaving an opening to insert a fan for inflation. Stake it down for outdoor movie nights.
b. Projection on a Blank Wall or Bed Sheet: Use the side of a building, garage door, or a large bed sheet as an impromptu outdoor screen. Just ensure the surface is smooth and properly tensioned.
4. Creative Screen Alternatives
a. Holographic Rear Projection Film: Experiment with holographic rear projection film that can turn glass windows or acrylic panels into high-quality projection surfaces.
b. DIY Retractable Screens: Repurpose materials like vinyl blinds or large canvas rolls into a retractable screen by attaching them to a roller mechanism.
5. Innovative Frame Ideas
a. Wooden Frame: Build a wooden frame using lumber or repurposed pallets and staple the screen material to it for a sturdy and customizable DIY screen.
b. PVC Pipe Frame: Create a lightweight and adjustable PVC pipe frame that can be assembled and disassembled for easy storage and transport.
6. Enhancements and Accessories
a. Reflective Coatings: Apply reflective coatings or enhancers to improve the screen's reflective properties and enhance image brightness.
b. DIY Screen Tensioning: Implement DIY tensioning systems using elastic cords or bungee cords attached to the screen's edges to maintain a smooth surface.
Conclusion
DIY projector screens offer flexibility and creativity, allowing you to design and construct personalized projection surfaces to fit your space and needs. Experiment with various materials, repurposed items, and creative ideas to craft a unique projector screen that complements your setup.
In the subsequent sections, we'll delve deeper into step-by-step guides and additional tips for creating DIY projector screens for different settings and purposes.
Projector screens play a pivotal role in transforming ordinary visual presentations into captivating and immersive experiences. As the technological landscape advances, projector screens continue to evolve, offering a myriad of options to suit various needs and environments.
Enhanced Viewing Quality and Immersion
Investing in a quality projector screen significantly elevates the viewing quality and immersion levels of any projected content, whether it's for home entertainment, professional presentations, educational purposes, or large-scale events. The choice of the right screen material, size, aspect ratio, and surface type directly impacts the clarity, color accuracy, and overall visual impact of the displayed content.
Versatility and Adaptability
One of the key advantages of projector screens lies in their versatility. From fixed screens tailored for dedicated home theaters to portable screens suitable for outdoor movie nights, projector screens adapt to diverse settings and purposes. They offer flexibility in size, portability, and setup, ensuring an enjoyable viewing experience wherever they are deployed.
Customization and Personalization
DIY solutions have opened doors to creative and personalized projector screen options. With various materials, repurposed items, and innovative ideas, individuals can craft their unique projection surfaces, reflecting their preferences, space constraints, and artistic visions. This customization fosters a sense of ownership and creativity in the projection setup.
Technological Advancements
The constant technological advancements in projector screen materials and features continue to revolutionize the viewing experience. Innovations like ambient light rejecting (ALR) screens, motorized functionalities, ultra-high definition (UHD), and smart screens contribute to sharper images, better contrast, and smarter functionalities, enhancing user experiences across different environments.
Conclusion: Impact on Visual Entertainment
In conclusion, projector screens hold a significant place in the realm of visual entertainment and presentations. Whether it's a family movie night, an important business presentation, educational lectures, or a grand cinematic event, the quality and suitability of the projector screen influence the overall impact and success of the visual experience.
By choosing the right projector screen, whether off-the-shelf or through creative DIY solutions, individuals can create captivating and engaging visual experiences that leave a lasting impression.